Resources
Case Study: Taking In-process Tool Inspection to the Next Level
To the human eye, a .125 drill bit and a .110 drill bit are almost indistinguishable. With thousands of tools in a manufacturing facility, it is very easy to get tool sizes mixed up and using an incorrect diameter tool can lead to scrapping a several thousand dollar part.
Our customer, a leading and innovative manufacturer of complex aerospace systems, asked us to help implement a system to ensure the actual tool being used matched with the required tool from the process plan. Individual components often required up to 40 hours of machining time and the use of hundreds of different cutting tools, drills, taps and reamers.
Working with our customer’s manufacturing engineering team, PQI developed a solution that not only met this need but created a historical record that provided time sequential process improvement data. In one instance, a record of tool failures was traced back to a CAD/CAM software version update that had unintended consequences for certain machining parameters like speeds and feeds.

Our Solution
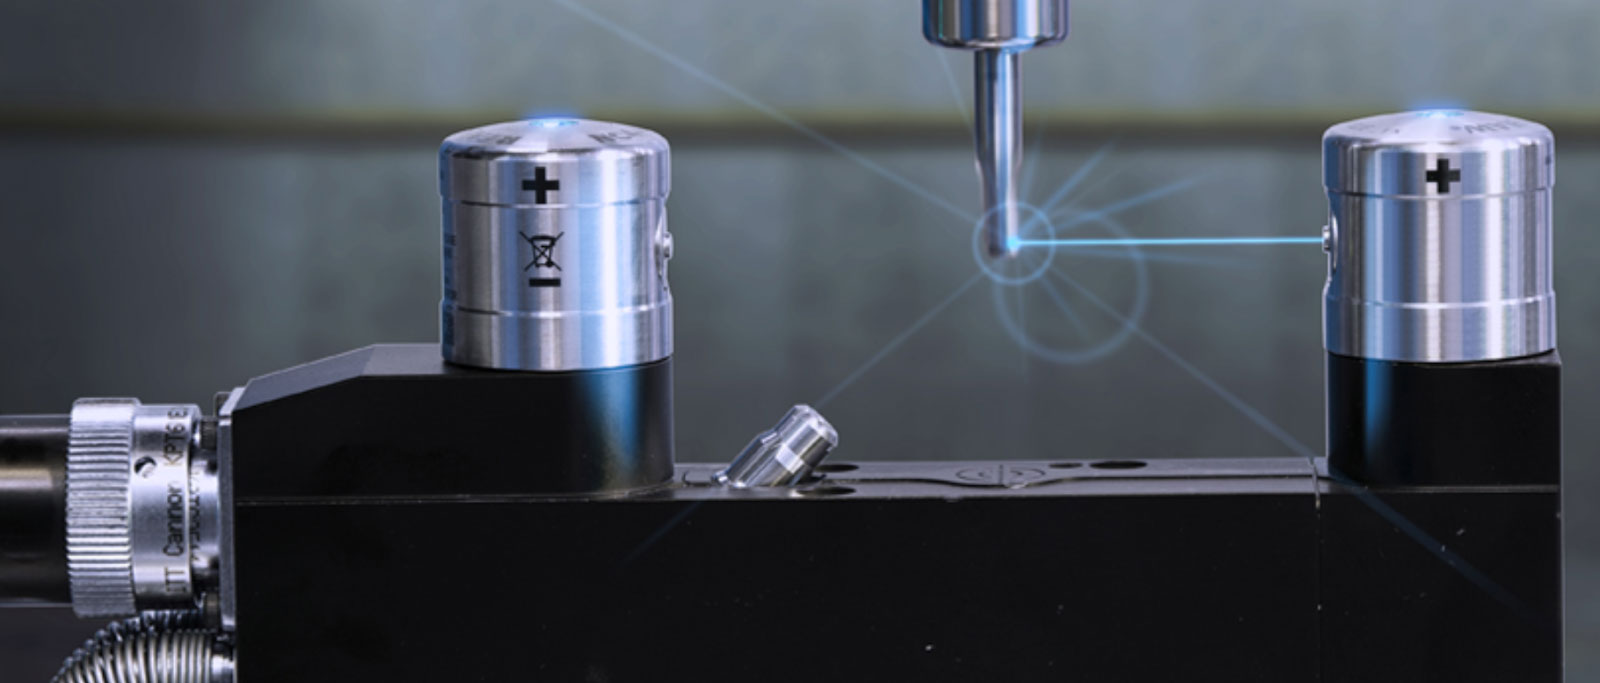
The heart of the system is a Renishaw NC4 non-contact laser tool setting / tool checking system.

Within the CNC control, a canned macro is used to control the NC4 tool measurement process. For this application, additional custom macros were added to assist the manufacturing engineers and CAD/CAM programmers to easily implement the solution for new machining applications.
A single custom code command after a tool change triggers the custom software to request the nominal tool data for the tool number currently in the spindle, inspect the tool to verify compliance to its specifications and make a decision to continue, use a redundant tool (also verified) or stop the process.
At the end of the tool’s cutting cycle, a broken tool check verifies the tool is still qualified for continued use. These commands are easily added to the CAD/CAM post-processor, not adding to the programming burden on manufacturing engineers and programmers.
Additional functionality included in our tool management solution:
- Automated tool type categories to simplify parameter set up for new tools
- Easy automation for new tool verification and flexible intervals for monitoring tool wear.
- Tool corner radius measurement for ball end mill and bullnose tools to ensure the radius is within tolerance for radiuses and profiles.
- Enhanced tool length determination for five axis machining operations. It is critical in this environment that tools are secured in the tool holder within a specified length window in order to perform the necessary cutting processes and maintain clearances to eliminate part, fixture and/or spindle crashes while performing cutting operations.
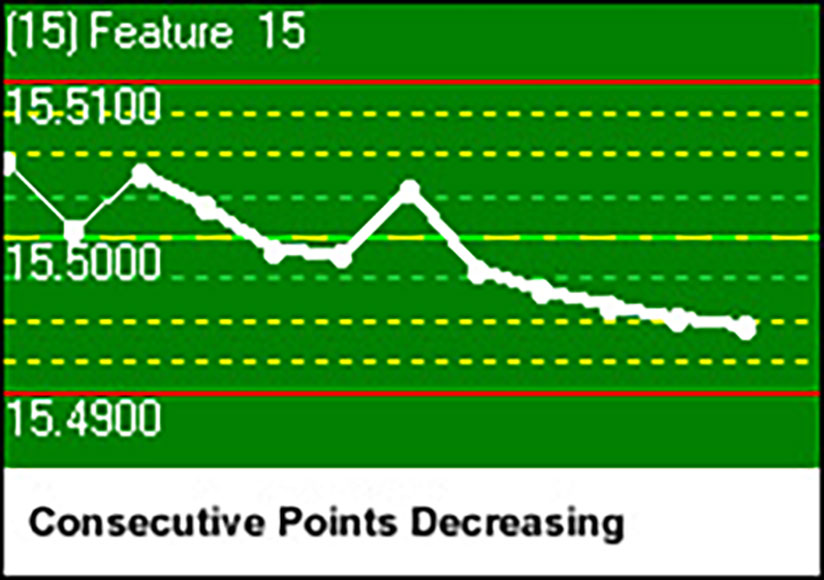
- All of the tool data is collected by software developed by PQI and provided to SPC software for display at the operator station. Any tool check resulting in an out of tolerance measure will stop and alarm the machine prior to the cutting process. The SPC data also has been able to help manufacturing engineers focus on specific ‘problem’ tools by tracking trends and automating decision points.

Have you encountered any difficulties with managing tools and predicting tool life? Could easily understandable data and graphic reporting help improve things? Please give us a call to discuss how we can build and implement a comprehensive tool management solution unique to your needs.
